# dc-health-license-scraper (`tawani/dc-health-license-scraper`) Actor
- **URL**: https://apify.com/tawani/dc-health-license-scraper.md
- **Developed by:** [Tawani Anyangwe](https://apify.com/tawani) (community)
- **Stats:** 1 total users, 0 monthly users, 0.0% runs succeeded, 0 bookmarks
- **User rating**: No ratings yet
## Pricing
Pay per usage
This Actor is paid per platform usage. The Actor is free to use, and you only pay for the Apify platform usage, which gets cheaper the higher subscription plan you have.
Learn more: https://docs.apify.com/actors/running/actors-in-store.md#pay-per-usage
## What's an Apify Actor?
An Actor is a serverless cloud program that runs on the Apify platform. It has two run modes.
In Batch mode, an Actor accepts a well-defined JSON input, performs an action which can take anything from a few seconds to a few hours,
and optionally produces a well-defined JSON output, datasets with results, or files in key-value store.
In Standby mode, an Actor provides a web server which can be used as a website, API, or an MCP server.
Apify vocabulary and the platform model are defined once, in the agent quickstart at https://apify.com/agents.md.
## How to integrate an Actor?
If asked about integration, you help developers integrate Actors into their projects.
You adapt to their stack and deliver integrations that are safe, well-documented, and production-ready.
Do not guess an integration path. Every one of them is in the agent quickstart at https://apify.com/agents.md: the Apify MCP server, Agent Skills with the Apify CLI, the JavaScript and Python clients, the REST API, and the account-free path for an agent with no human to sign in. It also carries the rule on stating cost before the first paid run.
For examples already wired to this Actor's own input schema, see the [API](#api) section below.
Each client library has reference documentation the quickstart does not restate: [JavaScript/TypeScript](https://docs.apify.com/api/client/js/docs.md) (`npm install apify-client`) and [Python](https://docs.apify.com/api/client/python/docs.md) (`pip install apify-client`).
# README
### Playwright test template
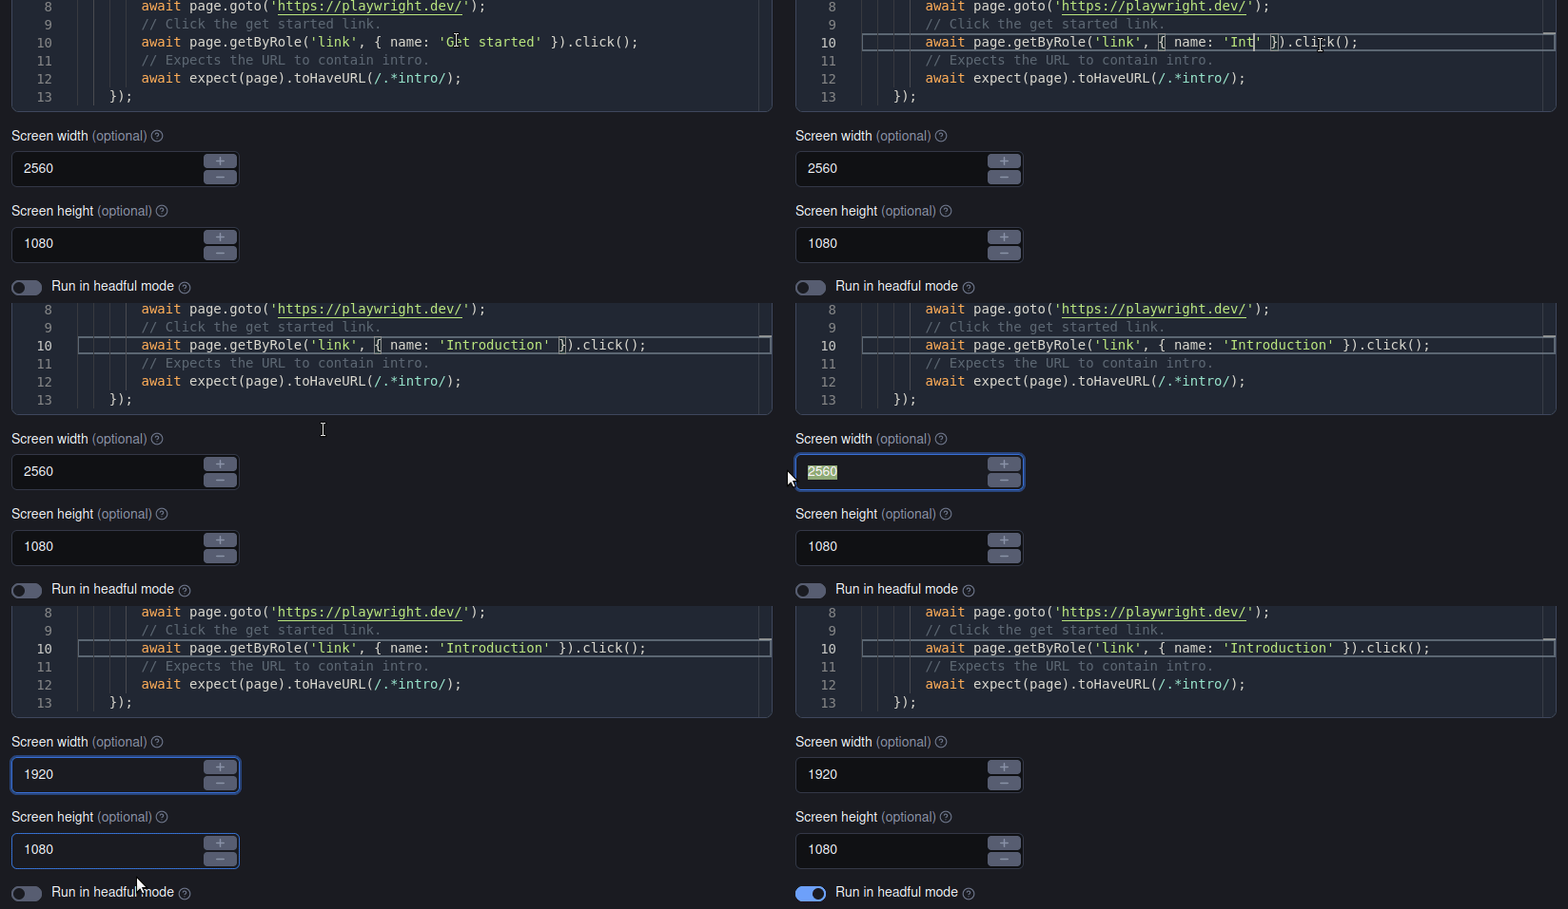
Run your Playwright tests on the Apify platform effectively and easily. Just set up your test environment using a user-friendly UI and let the platform do the rest.
> Note: This is a custom version of Playwright Test Runner Actor. Unlike the original Actor, this version reads test suite files from the tests folder and does not allow you to pass the test files via Apify input.
### Features
#### Run your Playwright tests on the Apify platform
No more pre-commit hooks or CI/CD pipelines. Integrate your tests with the Apify Platform using a user-friendly UI and forget about the hassle of setting up your test environment.
 #### Collect and analyze your test results online
After running the tests, the Apify platform stores the results in comprehensive datasets. You can view the results directly on the platform or download them to your local machine using a REST API.
#### Collect and analyze your test results online
After running the tests, the Apify platform stores the results in comprehensive datasets. You can view the results directly on the platform or download them to your local machine using a REST API.
 #### No more problems with incompatible browser versions
Playwright Test toolkit automatically downloads the latest versions of Chromium, Firefox, and WebKit browsers and installs them in the Apify platform.
This way, you can test your websites using all the popular browsers without worrying about compatibility issues.
#### No more problems with incompatible browser versions
Playwright Test toolkit automatically downloads the latest versions of Chromium, Firefox, and WebKit browsers and installs them in the Apify platform.
This way, you can test your websites using all the popular browsers without worrying about compatibility issues.
 ### How to use
Just provide your test suite files in the `tests` folder and run the Actor. The Actor will automatically run all the tests in the `tests` folder and store the results in the KVS/dataset fields.
You can also customize the test run by specifying other options in the input, e.g. the screen size, headful/headless execution or the maximum run time.
#### Test Generator
You can also use the Playwright Codegen to compose your test suites even faster. Just run `npm run codegen` in your project folder and record your workflow.
The code generator will automatically create a test suite file for you and save it in the `tests` folder.
### Resources
- Original [Playwright Test Runner](https://apify.com/jindrich.bar/playwright-test) Actor
- [Playwright testing: how to write and run E2E tests properly](https://blog.apify.com/playwright-testing-how-to-write-and-run-e2e-tests-properly/)
- [Video guide on getting scraped data using Apify API](https://www.youtube.com/watch?v=ViYYDHSBAKM)
- [Integration with Make](https://apify.com/integrations), GitHub, Zapier, Google Drive, and other apps
- Video tutorial on how to run end-to-end Playwright tests
- A short guide on [how to build web scrapers using code templates](https://www.youtube.com/watch?v=u-i-Korzf8w)
[Video tutorial on how to run end-to-end Playwright tests](https://www.youtube.com/watch?v=V5DEx5x7I0w)
### Getting started
For complete information [see this article](https://docs.apify.com/platform/actors/development#build-actor-at-apify-console). In short, you will:
1. Build the Actor
2. Run the Actor
### Pull the Actor for local development
If you would like to develop locally, you can pull the existing Actor from Apify console using Apify CLI:
1. Install `apify-cli`
**Using Homebrew**
```bash
brew install apify-cli
```
**Using NPM**
```bash
npm -g install apify-cli
```
2. Pull the Actor by its unique ``, which is one of the following:
- unique name of the Actor to pull (e.g. "apify/hello-world")
- or ID of the Actor to pull (e.g. "E2jjCZBezvAZnX8Rb")
You can find both by clicking on the Actor title at the top of the page, which will open a modal containing both Actor unique name and Actor ID.
This command will copy the Actor into the current directory on your local machine.
```bash
apify pull
```
### Documentation reference
To learn more about Apify and Actors, take a look at the following resources:
- [Apify SDK for JavaScript documentation](https://docs.apify.com/sdk/js)
- [Apify SDK for Python documentation](https://docs.apify.com/sdk/python)
- [Apify Platform documentation](https://docs.apify.com/platform)
- [Join our developer community on Discord](https://discord.com/invite/jyEM2PRvMU)
# Actor input Schema
## `firstName` (type: `string`):
First name of the health professional.
## `lastName` (type: `string`):
Last name of the health professional.
## `profession` (type: `string`):
Exact text label matching the state profession dropdown.
## `licenseNumber` (type: `string`):
Optional unique provider license ID code.
## Actor input object example
```json
{}
```
# Actor output Schema
## `results` (type: `string`):
No description
## `report` (type: `string`):
No description
# API
You can run this Actor programmatically using our API. Below are code examples in JavaScript, Python, and CLI, as well as the OpenAPI specification and MCP server setup.
## JavaScript example
```javascript
import { ApifyClient } from 'apify-client';
// Initialize the ApifyClient with your Apify API token
// Replace the '' with your token
const client = new ApifyClient({
token: '',
});
// Prepare Actor input
const input = {};
// Run the Actor and wait for it to finish
const run = await client.actor("tawani/dc-health-license-scraper").call(input);
// Fetch and print Actor results from the run's dataset (if any)
console.log('Results from dataset');
console.log(`💾 Check your data here: https://console.apify.com/storage/datasets/${run.defaultDatasetId}`);
const { items } = await client.dataset(run.defaultDatasetId).listItems();
items.forEach((item) => {
console.dir(item);
});
// 📚 Want to learn more 📖? Go to → https://docs.apify.com/api/client/js/docs
```
## Python example
```python
from apify_client import ApifyClient
# Initialize the ApifyClient with your Apify API token
# Replace '' with your token.
client = ApifyClient("")
# Prepare the Actor input
run_input = {}
# Run the Actor and wait for it to finish
run = client.actor("tawani/dc-health-license-scraper").call(run_input=run_input)
# Fetch and print Actor results from the run's dataset (if there are any)
print(f"💾 Check your data here: https://console.apify.com/storage/datasets/{run.default_dataset_id}")
for item in client.dataset(run.default_dataset_id).iterate_items():
print(item)
# 📚 Want to learn more 📖? Go to → https://docs.apify.com/api/client/python/docs/quick-start
```
## CLI example
```bash
echo '{}' |
apify call tawani/dc-health-license-scraper --silent --output-dataset
```
## MCP server setup
```json
{
"mcpServers": {
"apify": {
"type": "http",
"url": "https://mcp.apify.com/?tools=fetch-actor-details,tawani/dc-health-license-scraper"
}
}
}
```
The hosted server signs you in with OAuth on first connect, so no API token belongs in this config. Clients without OAuth support can send an `Authorization: Bearer ` header instead, using a token from API & Integrations in Apify Console (https://console.apify.com/settings/integrations).
## OpenAPI specification
Download the OpenAPI definition: https://api.apify.com/v2/actors/c88FYmLioCja7Z7st/builds/hBdt4XMgix14V7Am9/openapi.json
### How to use
Just provide your test suite files in the `tests` folder and run the Actor. The Actor will automatically run all the tests in the `tests` folder and store the results in the KVS/dataset fields.
You can also customize the test run by specifying other options in the input, e.g. the screen size, headful/headless execution or the maximum run time.
#### Test Generator
You can also use the Playwright Codegen to compose your test suites even faster. Just run `npm run codegen` in your project folder and record your workflow.
The code generator will automatically create a test suite file for you and save it in the `tests` folder.
### Resources
- Original [Playwright Test Runner](https://apify.com/jindrich.bar/playwright-test) Actor
- [Playwright testing: how to write and run E2E tests properly](https://blog.apify.com/playwright-testing-how-to-write-and-run-e2e-tests-properly/)
- [Video guide on getting scraped data using Apify API](https://www.youtube.com/watch?v=ViYYDHSBAKM)
- [Integration with Make](https://apify.com/integrations), GitHub, Zapier, Google Drive, and other apps
- Video tutorial on how to run end-to-end Playwright tests
- A short guide on [how to build web scrapers using code templates](https://www.youtube.com/watch?v=u-i-Korzf8w)
[Video tutorial on how to run end-to-end Playwright tests](https://www.youtube.com/watch?v=V5DEx5x7I0w)
### Getting started
For complete information [see this article](https://docs.apify.com/platform/actors/development#build-actor-at-apify-console). In short, you will:
1. Build the Actor
2. Run the Actor
### Pull the Actor for local development
If you would like to develop locally, you can pull the existing Actor from Apify console using Apify CLI:
1. Install `apify-cli`
**Using Homebrew**
```bash
brew install apify-cli
```
**Using NPM**
```bash
npm -g install apify-cli
```
2. Pull the Actor by its unique ``, which is one of the following:
- unique name of the Actor to pull (e.g. "apify/hello-world")
- or ID of the Actor to pull (e.g. "E2jjCZBezvAZnX8Rb")
You can find both by clicking on the Actor title at the top of the page, which will open a modal containing both Actor unique name and Actor ID.
This command will copy the Actor into the current directory on your local machine.
```bash
apify pull
```
### Documentation reference
To learn more about Apify and Actors, take a look at the following resources:
- [Apify SDK for JavaScript documentation](https://docs.apify.com/sdk/js)
- [Apify SDK for Python documentation](https://docs.apify.com/sdk/python)
- [Apify Platform documentation](https://docs.apify.com/platform)
- [Join our developer community on Discord](https://discord.com/invite/jyEM2PRvMU)
# Actor input Schema
## `firstName` (type: `string`):
First name of the health professional.
## `lastName` (type: `string`):
Last name of the health professional.
## `profession` (type: `string`):
Exact text label matching the state profession dropdown.
## `licenseNumber` (type: `string`):
Optional unique provider license ID code.
## Actor input object example
```json
{}
```
# Actor output Schema
## `results` (type: `string`):
No description
## `report` (type: `string`):
No description
# API
You can run this Actor programmatically using our API. Below are code examples in JavaScript, Python, and CLI, as well as the OpenAPI specification and MCP server setup.
## JavaScript example
```javascript
import { ApifyClient } from 'apify-client';
// Initialize the ApifyClient with your Apify API token
// Replace the '' with your token
const client = new ApifyClient({
token: '',
});
// Prepare Actor input
const input = {};
// Run the Actor and wait for it to finish
const run = await client.actor("tawani/dc-health-license-scraper").call(input);
// Fetch and print Actor results from the run's dataset (if any)
console.log('Results from dataset');
console.log(`💾 Check your data here: https://console.apify.com/storage/datasets/${run.defaultDatasetId}`);
const { items } = await client.dataset(run.defaultDatasetId).listItems();
items.forEach((item) => {
console.dir(item);
});
// 📚 Want to learn more 📖? Go to → https://docs.apify.com/api/client/js/docs
```
## Python example
```python
from apify_client import ApifyClient
# Initialize the ApifyClient with your Apify API token
# Replace '' with your token.
client = ApifyClient("")
# Prepare the Actor input
run_input = {}
# Run the Actor and wait for it to finish
run = client.actor("tawani/dc-health-license-scraper").call(run_input=run_input)
# Fetch and print Actor results from the run's dataset (if there are any)
print(f"💾 Check your data here: https://console.apify.com/storage/datasets/{run.default_dataset_id}")
for item in client.dataset(run.default_dataset_id).iterate_items():
print(item)
# 📚 Want to learn more 📖? Go to → https://docs.apify.com/api/client/python/docs/quick-start
```
## CLI example
```bash
echo '{}' |
apify call tawani/dc-health-license-scraper --silent --output-dataset
```
## MCP server setup
```json
{
"mcpServers": {
"apify": {
"type": "http",
"url": "https://mcp.apify.com/?tools=fetch-actor-details,tawani/dc-health-license-scraper"
}
}
}
```
The hosted server signs you in with OAuth on first connect, so no API token belongs in this config. Clients without OAuth support can send an `Authorization: Bearer ` header instead, using a token from API & Integrations in Apify Console (https://console.apify.com/settings/integrations).
## OpenAPI specification
Download the OpenAPI definition: https://api.apify.com/v2/actors/c88FYmLioCja7Z7st/builds/hBdt4XMgix14V7Am9/openapi.json