Crawlee Blog Scraper
Pricing
Pay per event
Pricing
Pay per event
Rating
0.0
(0)
Developer
Josef Procházka
Maintained by CommunityActor stats
1
Bookmarked
17
Total users
0
Monthly active users
9 months ago
Last modified
Categories
Share
Crawlee Blog Crawler
Example Actor to demonstrate how to use Crawlee on Apify platform. It scrapes blog posts from Crawlee blog, groups them by author and saves the results to a persistent storage we call a dataset.
This tutorial will show how to create an Actor in two different ways
- in browser on our platform
- you need Apify account
- locally on your computer and pushing to Apify platform using Apify cli
- you need Apify account
- you need Apify cli
- having uv or poetry helps
Step by step creation
Create project from Apify template (on Apify platform)
Click on Develop new

Click on View all templates

Filter by Python templates and select ParselCrawler

Use the selected template

Build it and start it

Navigate to Crawlee blog and inspect the page
Navigate to https://crawlee.dev/blog and inspect the page structure. See articles and authors and also all articles list on the left side. Think about how to extract all article names and group them by author.
Approach in this example:
We will scrape all articles urls from the left side list and then visit each article page to extract the author name.
Step 1 - Get links to all articles.
To inspect the page navigate to the page in your browser and press F12 to open developers tools. Select the inspector and pick the element you want to inspect it. You will see that all those links to the articles start are relative and start with /blog...

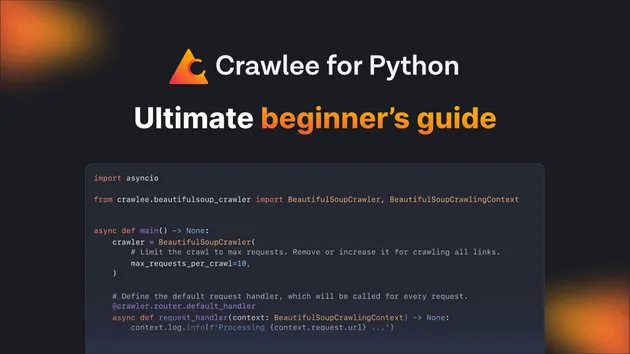
To extract data from webpages we use crawlers and to define how the crawler will process specific page we use request_handlers. Crawler can have many different request handlers, and we organize them in router. Router decides which page will be processed with which handler. Let's create default_handler for processing the pages by our crawler.
In our case we want to create handler that will extract all links like this "https://crawlee.dev/blog/..." from the page. We can use some helper functions defined on the crawling context object. We will use context.enqueue_links to extract all links and add them to the crawler request queue. We will use include and exclude patterns to filter out only relevant links. So we will include links with this pattern: "https://crawlee.dev/blog/...", but exclude some false positives from this pattern that do not point to the articles, like "https://crawlee.dev/blog/tags/..." and "https://crawlee.dev/blog/page/...".
One way to define a request handler is through a decorator:
We can use label parameter of the enqueue_links method to label those requests with "ARTICLE" label to instruct the router to process these pages with different handler.
Step 2 - Get author and article name from each detailed article page.
So now we have all article links in the request queue. We need to create another handler that will process each article page and extract the author name and article title.
This handler will use Parsel library for parsing the http response and xpath selectors to select the information we are interested in. Then the handler will save this information to predefined defaultdict, so that each author (dictionary key) has list of articles (dictionary value)
Step 3 - Save results to some storage.
Now we have all the authors and their articles. Lets save it somewhere so that the user can view it or download it after the crawler is finished.
Step 4 - Run Actor on the Apify platform
Rebuild the Actor if there are any changes and start it again.
Step 5 - View the results
Now you can inspect the extracted data saved in the dataset.

Step 6 - Add Actor input
You can also have some inputs to your Actor. In this example we will add input to optionally specify the name of the author you are interested in. You can define the input schema in the ./actor/INPUT_SCHEMA.json file.
In the .actor folder you should have actor.json file that defines details of the Actor:
Add this object to the properties of input_schema.json:
Extract the desired author from the input:
Filter extracted authors by the desired author:
Step 7 - Monetization
In order to monetize your actor you have to think about what will the user pay for. For example, you can make user pay for certain events in your code. For that you can use Actor.charge method. When that method executes the user is charged for the amount defined in the event:
You can then set up monetization of your actor in the Apify store.
See the publication tab:

Set pricing model:

Set pricing events:

For more details about publishing and monetization, please refer to the documentation: https://docs.apify.com/platform/actors/publishing
Local development workflow
Create project using Crawlee template (locally)
Run crawlee-cli:
or
Select following options to create template that we will build upon:
- example-crawler
- Parsel
- Impit
- Uv
- https://crawlee.dev/blog
- y
- y
Navigate to newly created project folder, examine it and try to run the template:
Run Actor on the Apify platform
Make sure apify is installed. You can follow the installation guide: https://docs.apify.com/cli/docs/installation
Push the locally developed Actor to the Apify platform (if developing locally) by running:
Follow the link produced in the end of apify push command output and start the Actor on the Apify platform.
Useful links
Did you enjoy scraping and want to learn more? Just check out one of the following links
- Crawlee for Python
- Apify SDK
- Apify API client
- Crawlee guides
- Crawlee blog
- Apify web scraping academy and for python here
- Step by step guide to extract data here
- Looking for some inspiration what to build? Check the ideas page
- Actor whitepaper
- Create Actor from template video
- How to build and monetize Actors on Apify Store - Earn passive income from your scrapers video
- Apify Discord channel
- Apify Actors developers
QR code to this repo: