Web Scraper Experimental Debug
Pricing
Pay per usage
Web Scraper Experimental Debug

Experimental version of Apify Web Scraper with Chrome debugger integrated
0.0 (0)
Pricing
Pay per usage
3
Total users
63
Monthly users
2
Runs succeeded
>99%
Last modified
4 years ago
Experimental version of Apify Web Scraper with Chrome debugger integrated
How it works
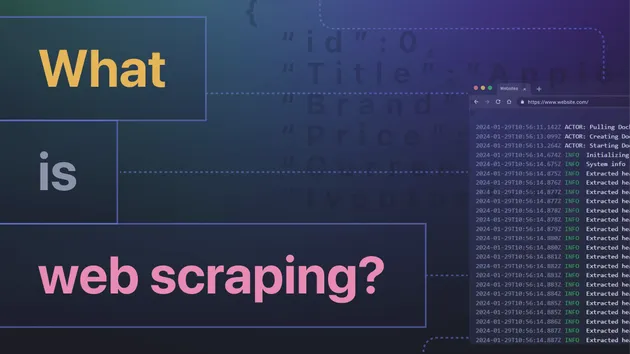
Web Scraper is a ready-made solution for scraping the web using the Chrome browser. It takes away all the work necessary to set up a browser for crawling, controls the browser automatically and produces machine readable results in several common formats.
Underneath, it uses the Puppeteer library to control the browser, but you don't need to worry about that. Using a simple web UI and a little of basic JavaScript, you can tweak it to serve almost any scraping need.
Getting Started
If you're new to scraping or Apify, be sure to visit our tutorial to walk you through creating your first scraping task step by step.
Input
Input is provided via the pre-configured UI. See the tooltips for more info on the available options.
Page function
Page function is a single JavaScript function that enables the user to control the Scraper's operation,
manipulate the visited pages and extract data as needed. It is invoked with a context object
containing the following properties:
context
The following tables describe the context object in more detail.
Data structures
| Argument | Type |
input | Object |
Input as it was received from the UI. Each pageFunction invocation gets a fresh
copy and you can not modify the input by changing the values in this object.
| |
env | Object |
A map of all the relevant environment variables that you may want to use. See the
Apify.getEnv()
function for a preview of the structure and full documentation.
| |
customData | Object |
Since the input UI is fixed, it does not support adding of other fields that may be needed for all
specific use cases. If you need to pass arbitrary data to the scraper, use the Custom data input field
and its contents will be available under the customData context key.
| |
Functions
The context object provides several helper functions that make scraping and saving data easier
and more streamlined. All of the functions are async so make sure to use await with their invocations.
| Argument | Arguments |
setValue | (key: string, data: Object, options: Object) |
To save data to the default key-value store, you can use the setValue function.
See the full documentation:
Apify.setValue()
function.
| |
getValue | (key: string) |
To read data from the default key-value store, you can use the getValue function.
See the full documentation:
Apify.getValue()
function.
| |
waitFor | (task: number|string|Function, options: Object) |
The waitFor function enables you to wait
for various events in the scraped page. The first argument determines its behavior.
If you use a number, such as await waitFor(1000), it will wait for the provided
number of milliseconds. The other option is using a CSS selector string
which will make the function wait until the given selector appears in the page. The final option
is to use a Function. In that case, it will wait until the provided function returns
true.
| |
saveSnapshot | |
| A helper function that enables saving a snapshot of the current page's HTML and its screenshot into the default key value store. Each snapshot overwrites the previous one and the function's invocations will also be throttled if invoked more than once in 2 seconds, to prevent abuse. So make sure you don't call it for every single request. You can find the screenshot under the SNAPSHOT-SCREENSHOT key and the HTML under the SNAPSHOT-HTML key. | |
skipLinks | |
With each invocation of the pageFunction the scraper attempts to extract
new URLs from the page using the Link selector and PseudoURLs provided in the input UI.
If you want to prevent this behavior in certain cases, call the skipLinks
function and no URLs will be added to the queue for the given page.
| |
enqueueRequest | (request: Request|Object, options: Object) |
To enqueue a specific URL manually instead of automatically by a combination of a Link selector
and a Pseudo URL, use the enqueueRequest function. It accepts a plain object as argument
that needs to have the structure to construct a
Request object.
But frankly, you just need a URL: { url: 'https://www.example.com }
| |
jQuery | see jQuery docs |
To make the DOM manipulation within the page easier, you may choose the Inject jQuery
option in the UI and all the crawled pages will have an instance of the
jQuery library
available. However, since we do not want to modify the page in any way, we don't inject it
into the global $ object as you may be used to, but instead we make it available
in context. Feel free to const $ = context.jQuery to get the familiar notation.
| |
Class instances and namespaces
The following are either class instances or namespaces, which is just a way of saying objects with functions on them.
Request
Apify uses a request object to represent metadata about the currently crawled page,
such as its URL or the number of retries. See the
Request
class for a preview of the structure and full documentation.
Response
The response object is produced by Puppeteer. Currently, we only pass the HTTP status code
and the response headers to the context.
Global Store
globalStore represents an instance of a very simple in memory store that is not scoped to the individual
pageFunction invocation. This enables you to easily share global data such as API responses, tokens and other.
Since the stored data need to cross from the Browser to the Node.js process, it cannot be any kind of data,
but only JSON stringifiable objects. You cannot store DOM objects, functions, circular objects and so on.
globalStore supports the full
Map API
, with the following limitations:
- All methods of
globalStoreareasync. Useawait. - Only
stringkeys can be used and the values need to be JSON stringifiable. map.forEach()is not supported.
Log
log is a reference to
Apify.utils.log.
You can use any of the logging methods such as log.info or log.exception.
log.debug is special, because you can trigger visibility of those messages in the
scraper's Log by the provided Debug log input option.
Underscore
Underscore is a helper library.
You can use it in your pageFunction if you use the Inject Underscore input option.
Output
Output is a dataset containing extracted data for each scraped page. To save data into
the dataset, return an Object or an Object[] from the pageFunction.
Dataset
For each of the scraped URLs, the dataset contains an object with results and some metadata.
If you were scraping the HTML <title> of Apify and returning
the following object from the pageFunction
it would look like this:
You can remove the metadata (and results containing only metadata) from the results by selecting the Clean items option when downloading the dataset.
The result will look like this: