Monitoring
Pricing
Pay per usage
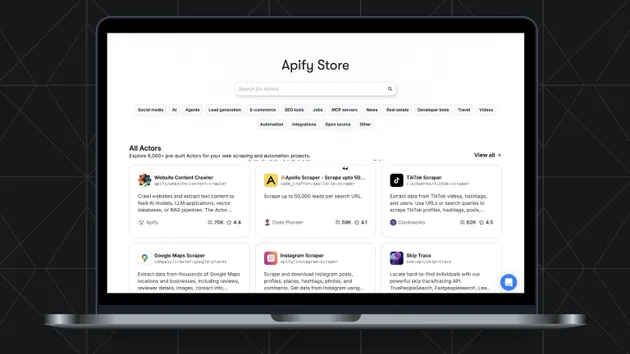
Go to Apify Store
Monitoring
This actor monitors your actors' statuses, validates their datasets' data, and displays useful information in an interactive dashboard. And if something happens, you'll get notified via email or Slack.